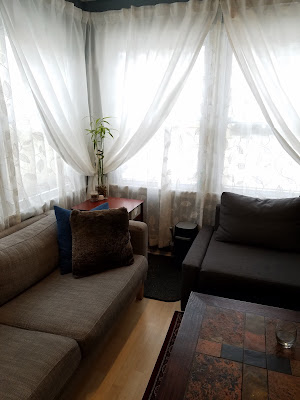
When we welcomed Mycroft home in July 2017, I wanted my cat stuff to be attractive or hidden. I didn't want litter everywhere or a giant tower taking over my living room. I also didn't want the four month old kitten wandering in the basement, especially because I didn't want him getting stuck down there by accident. This meant that the litter box, toys, and scratching posts would be somewhere in our living space or bedrooms.
I love my pets and tend to spend a little too much money on them. I want high quality for not just my home, but my animals. Per usual, I went to the internet. During my search, I found (and purchased) some great ideas on how to incorporate cat things into my space.
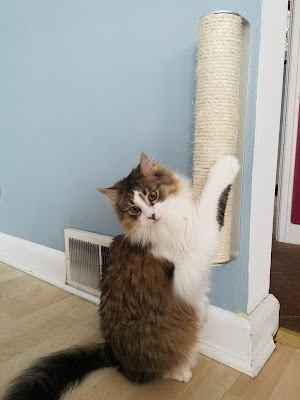
1. Wall-Mounted Scratching Post
I bought
this scratching post within Mycroft's first week home. I love that it's off the floor, which lets my
POWERbot reach underneath it, and that the mount is sturdy. I also like the slim, minimal design. It's perfect for small spaces. What really won me over is that the sisal post is removable and replaceable, which means this purchase should last forever.
While we mounted this vertically and near the floor, you could get creative if you're making a cat climbing wall. It could be mounted sideways, at an angle, and at any level on your walls.
It does come with mounting hardware. I installed it quickly with only a screwdriver.
2. Cat Scratching Post / Wall Mount Shelves / Steps

This set of
two posts is similar to the wall-mounted post I already own, but they're still on my wish list. I want to add them to the setup with the
cat shelves I installed last fall. My only concern is if I need to replace the sisal, it won't be as easy as the post we currently own.
These shelves are nice because of how they stick out like a set of floating stairs. I can already picture Mycroft stretching out on one of these, claiming his place as king of the hill (and house).
3. Cat Litter Box Table
Yes,
another Amazon item here. You can shop around for deals, but when I made these purchases, Amazon really did have the best price.

The litter box table resides in our living room. As many people recommended, I sealed the inside seams with caulk (I had leftover from resealing my shower) and bought a sealant spray to protect the inside from liquid and the scent of cat pee. I applied the spray before putting anything together. I used a
fast-drying polyurethane in clear satin, which did dry quickly. It works the same way a spray paint, so it's very simple to use. Just be careful because, as it notes on the can, if you are over-zealous, the table's original stain could drip. It's best to do a second coat after the first one dries completely.
Mycroft has never missed the box, but I bought
a litter box with high sides in case that ever changes.

As long as you follow the instructions CAREFULLY, you'll be able to fit everything together correctly. I was a little careless and realized I had a piece backwards. It was easy to fix and was not the manufacturers fault. I did put this together myself. It took about 20 minutes.
The table looks great, is very functional in our living room, and is holding up well. I've gotten so many compliments from my friends and family. An unexpected plus is that I smell the cat's poop less due to this enclosure. Our cat had no qualms about using his box inside the table.
New visitors often take a seat and then, with a somewhat bewildered look, ask, "Wait. Is there a litter box in there? I can't even smell it!"
While I'm busy recommending the table, I can tell you I am a huge fan of the
Imperial Cat Litter Mat (pictured) and
OkoCat Clumping Litter. Both have helped keep my space clean and smell-free.
4. DIY Catio
 This
This is on my summer list. But so is a raised garden bed. So this might be on
next summer's list of projects.
Mycroft would
love, love, love his own cat patio. Every morning, he runs to the window above our bed and watches the trees. He spends hours in the living room gazing at chunky squirrels and flitting birds. If we bring him out on a leash, he likes to stalk through the grass.
I like the plans posted on Instructables because it outlines the steps thoroughly, suggests modifications, shows other users photos, and doesn't cost a penny. This project might take a little elbow grease, but it is easily customizable and, since it's really a bunch of rectangles and squares, it should be workable even for the novice DIY-er. I dream of putting this on the side of our house.
5. Catnip Spray
 This spray
 is dried catnip's neater cousin. I like that it doesn't leave a mess and can be used on toys along with the scratching post. At this point, Mycroft knows where we keep the bottle and gets excited when I open that cabinet. As a young kitten, he didn't care as much about catnip, but now that he's almost a year old, he goes wild for it.
When I spray it on the wall-mounted scratching post (above), he starts scratching, licking, and rubbing the catnip. It also works well if you're trying to make cat toys bit more enticing. All I can say is it's simple for me and entertaining for him.


